Blood Orange and Vanilla Custard
It’s the second week of February, and we’re skating towards Valentine’s. Everywhere I look, chocolates of every shape and size are forming lines in pink and red heart-shaped boxes, gearing up for the big day. And it’s not that I have anything against them. I’m actually a fan of Valentine’s Day – I already sent out the cheesy cards, and will certainly be indulging in a chocolate or two – but I’ve encountered a bit of a… distraction: the early arrival of blood oranges.
Now, I realize this is my second mention of the cusp of citrus season, when tangerines and grapefruits are barely turning yellow. But what can I say? The tangy sweet fruits are the perfect antidote to winter doldrums – reminding us that spring and summer are but a few weeks away. And blood oranges, being one of the earliest (and most beautiful) arrivals, exemplify this perfectly.
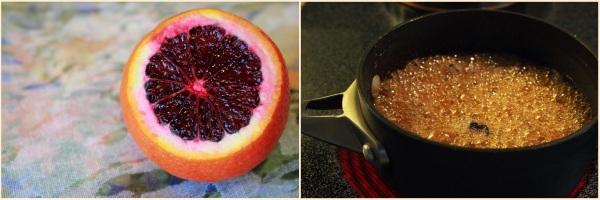
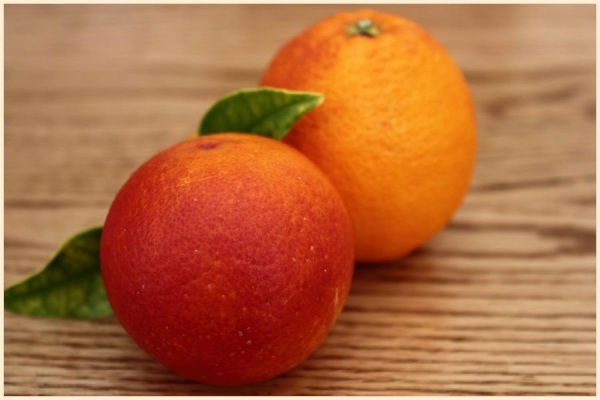
Blood oranges are named, of course, for their blood-red flesh. This surprising pigmentation is a result of the presence of anthocyanin, a powerful antioxidant, and is most intense when the fruit ripens in areas with warm days and cold nights. Many varieties have a blushing rind as well, but as often as not, they could easily be mistaken for sweet oranges from the outside. But just cut into one; witness the sticky sweet, ruby juices and the flecked rosy pulp, and there’s no mistaking that you have something special. Take a taste, and you’ll find that the magic of blood oranges lies even more in their distinctive flavor. Mingled with the expected citrus, you get another, fruitier flavor as well. A raspberry tartness echoed by the magenta juice.
And that is what makes this dessert so divine: the tart – almost bittersweet – flesh is the perfect counterpoint to the warm, sweet vanilla and rich texture of the custard, while a hint of orange zest brings everything together.
Baked Vanilla Custard with Blood Oranges
Ingredients
FOR THE CUSTARD
4-6 blood oranges
1 ½ cups whole milk
1 cup light whipping cream
1/2 cup plus 2 tablespoons sugar
1 Tbsp butter
1 2” piece vanilla bean, split in half lengthwise
3 large eggs
3 large egg yolks
FOR THE CARAMEL
1 cup sugar
1/4 cup water
1 star anise and 1 cardamom pod (optional)
1 teaspoon fresh blood orange juice
Method
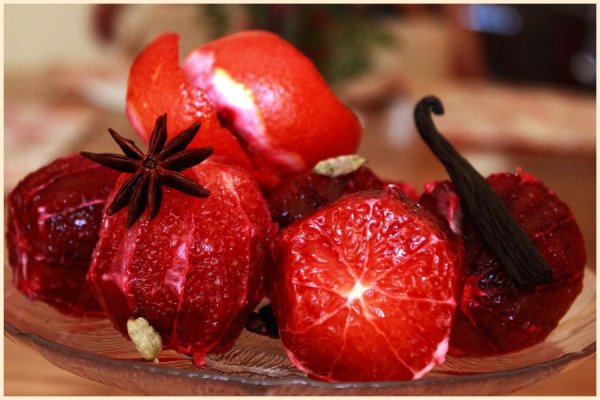
Using a vegetable peeler, remove zest (colored part only) in wide strips from two of the blood oranges and set aside. Use a small paring knife to completely remove entire peel and outer membrane from all the oranges and cut carefully between membranes to remove orange segments. Squeeze the leftover membranes over the segments to extract all the juice. Throw the membranes away, but reserve the segments and juice.
Combine milk, half and half, and ½ cup plus 2 Tbsp sugar in medium-sized saucepan. Scrape the seeds from the vanilla pod into the milk mixture, and add the empty bean. Heat over medium-high heat, stirring as the sugar dissolves. Add the butter and continue to heat just until bubbles form around the edges (this is also called scalding the milk). Remove from heat and immediately add orange peel strips. Cover and let steep for 10-15 minutes. Strain into a large mixing bowl.
Whisk eggs and yolks in small bowl just to blend. Temper the eggs by quickly whisking about ½ cup of the hot milk mixture into the eggs. Then slowly pour the warm egg mixture into the rest of the milk, whisking constantly to avoid cooking the eggs (no one likes sweetened vanilla scrambled eggs, trust me). Set aside to cool. At this point to custard will still be completely liquid and not thickened at all. This is normal.
Preheat oven to 325°F. Set aside 4 small ramekins or soufflé dishes (about 1 ½- to 2-cup size).
For the caramel sauce, mix 1 cup sugar, water, star anise, cardamom, and juice in a deep-sided 1- or 2-quart saucepan. Stir over medium heat until sugar dissolves completely. Increase heat and boil until syrup turns amber, occasionally scraping down the sides and gently stirring with a rubber spatula. This can take anywhere from 5-10 minutes. Note: at this point the sugar will be boiling violently, and it is tempting to want to stir it down. Don’t! The sugar needs to go through this stage to caramelize properly! To avoid a huge mess from sugar boil-over, use a deep enough pan that the sugar can triple in size without spilling and set your heat on medium-high (say, on 8 out of 10). Also be aware that sugar can turn from perfectly caramelized to hopelessly burned in a matter of seconds, so watch it VERY CLOSELY. As soon as it becomes a deep gold, remove it from the heat and pour it immediately into ramekins, making sure to remove the spices. The sugar will harden fairly quickly on the bottom of the dishes.
Ladle custard mixture over hardened caramel in the ramekins. Place all four in a roasting dish or large baking pan and set the entire thing onto your oven rack. Fill pan with enough hot water to come halfway up sides of dishes. Gently slide this into the oven, being careful not to slosh water around, and bake until center of custard is slightly wobbly when the ramekin is shaken, but the edges are completely set; about 45-55 mins. Remove ramekins from the hot water (I used a jar grabber from my canning supplies) and let stand at least 15 minutes or until completely set.
Run a thin, sharp knife around the sides of the ramekins to loosen custard. Place your serving plate on top of the ramekin and quickly invert the entire thing. Now comes the magic moment: remove the ramekin from the top of the custard, allow caramel to spill out over the custard. Top with orange segments and a tiny drizzle of remaining juice.
*******
On Buying and Storing Blood Oranges: Blood Oranges are very seasonal and are only available in the winter, beginning as early as November and lasting into late March. Purchasing blood oranges is a lot like purchasing any other citrus. The fruit should be firm and heavy for its size (this is an indicator of juiciness). The rind should be fragrant and brightly colored. Variation in color from deep yellow to dark red is normal, depending on variety, but avoid any with bright yellow or pale green areas, as this means the fruit was picked too early and will not have developed enough sugars. But note: deep green areas on oranges are not always an indicator of unripeness: “re-greening” is a natural process for citrus fruits stored in warm areas, like trucks and warehouses. Spots or scars are also totally normal and expected (they do grow in nature, after all) but soft areas, wrinkles, brown coloration, or deep holes are signs of rot.
Oranges stay juicier when kept at room temperature, but they will begin to go downhill after several days. Only buy the oranges you will use within a week, and remove any with signs of rot or mold immediately, as it can spread from fruit to fruit. If you must, you can store oranges in a freezer bag in the crisper drawer of the refrigerator to prolong their life. Finally, if you’re about to eat an orange, don’t waste the zest! Save it for later by peeling the orange with a vegetable peeler and freezing the strips in a zip-top bag indefinitely.


This looks so good! I made blood orange (and honey, thanks to you) sorbet last week. Now I might need to get some more blood oranges later this week.
Spectacular presentation and thorough method description, absolutely love the photography! Blood oranges are a fave of mine, shall have to try this found you via a pinterest 🙂